


’Lives fall apart when they need to be rebuilt.’- Iyanla Vanzant.
Healthy Gluten-Free Pancakes.
Written by Hali Tsotetsi
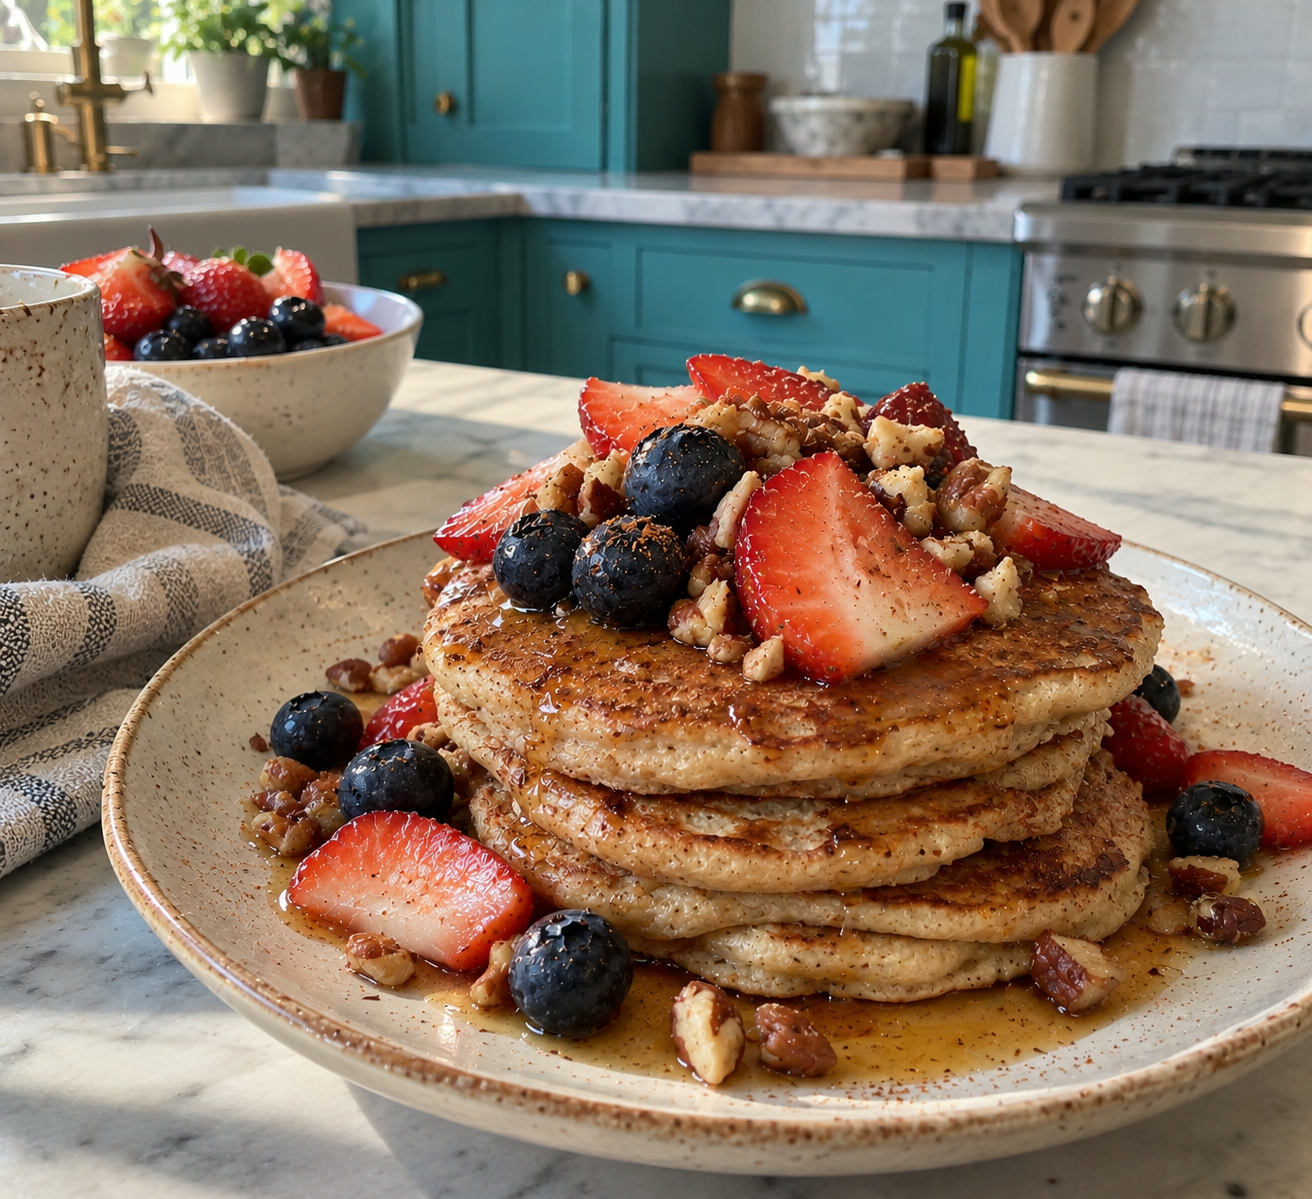
There’s something about pancakes that makes breakfast feel a little more special.
Maybe it’s the smell of vanilla and cinnamon filling the kitchen, the sound of batter sizzling in a warm pan or that first bite of a perfectly fluffy pancake topped with fresh berries and maple syrup.
Whatever it is, pancakes have always been one of those breakfasts that feel like a treat.
Since transitioning to a gluten-free lifestyle, I’ve been experimenting with ways to recreate some of my favorite foods without sacrificing the flavors and textures that made me love them in the first place.
And pancakes were definitely on that list.
One thing I quickly discovered is that gluten-free baking doesn’t have to be complicated. With the right combination of ingredients, you can make something just as delicious as the traditional version.
These pancakes are a perfect example.
Made with oat flour, almond flour, Greek yogurt and a hint of vanilla, they’re soft, fluffy and golden brown around the edges.
They have a subtle sweetness from pure maple syrup, a little warmth from cinnamon and a wonderfully tender texture.
I also love that they’re made with simple, nourishing ingredients that leave me feeling satisfied rather than overly full.
They’re the kind of pancakes you can enjoy on a leisurely Sunday morning or prepare ahead of time for a busy week.
And while they’re a healthier take on a classic breakfast, there’s nothing about them that feels like a substitute.
They’re simply really good pancakes.
Here is my healthy gluten-free pancake recipe.
Healthy Gluten-Free Pancakes
Prep time: 10 minutes
Cook time: 15 minutes
Total time: 25 minutes
Servings: 3 (approximately 9 small pancakes)
Ingredients
For the Pancakes
● 1 cup certified gluten-free oat flour
● ½ cup finely ground almond flour
● 2 teaspoons gluten-free baking powder
● ½ teaspoon ground cinnamon
● ¼ teaspoon salt
● ½ cup plain Greek yogurt
● ¾ cup unsweetened almond milk, plus more as needed
● 2 tablespoons pure maple syrup
● 1 tablespoon extra-virgin olive oil or melted coconut oil
● 1 teaspoon pure vanilla extract
● 1 teaspoon fresh lemon juice
● Olive oil or avocado oil, for cooking
For Serving
● ½ cup fresh blueberries
● ½ cup sliced strawberries
● 2 tablespoons pure maple syrup, or to taste
● 2 tablespoons chopped pecans or walnuts, optional
● A sprinkle of ground cinnamon, optional
Instructions
Start by preparing your dry ingredients.
In a large mixing bowl, combine the gluten-free oat flour, almond flour, baking powder, cinnamon and salt.
Whisk everything together until evenly combined.
In a separate bowl, add the Greek yogurt, almond milk, maple syrup, olive oil, vanilla extract and fresh lemon juice.
Whisk until the ingredients are smooth and well incorporated.
Slowly pour the wet ingredients into the dry ingredients.
Using a spatula or wooden spoon, gently stir everything together until a thick, smooth batter forms.
Be careful not to overmix.
The batter should be thick enough to hold its shape slightly when poured onto the pan but still easy to spread.
If the mixture seems too thick, add another tablespoon or two of almond milk until it reaches your preferred consistency.
Allow the batter to rest for approximately 5 minutes.
This gives the oat flour time to absorb some of the liquid and helps create a softer pancake.
While the batter rests, heat a large nonstick skillet or griddle over medium-low heat.
Lightly coat the surface with olive oil or avocado oil.
Once the pan is warm, pour approximately ¼ cup of batter onto the skillet for each pancake.
Use the back of a spoon to gently spread the batter into a round shape if necessary.
Allow the pancakes to cook for approximately 2–3 minutes on the first side.
You should begin to see small bubbles forming around the surface, and the edges should start to look slightly set.
Carefully flip each pancake using a spatula.
Cook for another 2–3 minutes, or until the second side is golden brown and the center is fully cooked.
Because these pancakes contain almond flour and Greek yogurt, they are slightly more delicate than traditional pancakes.
Cooking them over medium-low heat helps prevent the outside from browning too quickly before the inside has finished cooking.
Transfer the cooked pancakes to a plate and repeat with the remaining batter.
Add a little more oil to the skillet between batches if necessary.
Once all the pancakes are ready, stack them onto serving plates.
Top with fresh blueberries, sliced strawberries and a drizzle of pure maple syrup.
For a little extra texture, sprinkle chopped pecans or walnuts over the top.
Serve warm.
Optional Additions
One of my favorite things about homemade pancakes is how easy they are to customize.
If you love blueberries, try folding a handful directly into the batter before cooking.
The blueberries become warm and juicy as the pancakes cook, adding little bursts of sweetness throughout.
For a slightly more indulgent breakfast, add a tablespoon or two of dark chocolate chips to the batter.
Choose gluten-free dark chocolate chips with a high cocoa percentage for a richer chocolate flavor.
If you enjoy warm spices, try adding a pinch of nutmeg or cardamom alongside the cinnamon.
You can also add a little fresh lemon zest to the batter for a brighter, more refreshing flavor.
For extra protein, serve your pancakes with a spoonful of plain Greek yogurt or a side of cottage cheese.
If you prefer a dairy-free version, replace the Greek yogurt with a thick, unsweetened dairy-free yogurt.
The texture may vary slightly depending on the yogurt you choose.
And if you’re looking for something different from maple syrup, try gently warming fresh berries in a saucepan with a splash of water and a little lemon juice.
As the berries soften, they’ll release their natural juices and create a delicious homemade fruit topping.
Just remember to use certified gluten-free oats or oat flour and check the labels on your baking powder, yogurt, chocolate chips and other packaged ingredients.
This is especially important if you’re preparing these pancakes for someone with celiac disease.
Healthy Breakfasts Should Still Feel Like a Treat
One of the biggest things I’ve learned about making healthier food choices is that consistency becomes much easier when you genuinely enjoy what you’re eating.
I don’t want to wake up and feel like I have to choose between eating something nutritious and having a breakfast that actually tastes good.
I want both.
And that’s what I love about these pancakes.
The oat flour provides fiber, the almond flour adds healthy unsaturated fats, and the Greek yogurt contributes protein while helping create that soft, fluffy texture.
The vanilla, cinnamon and maple syrup give the pancakes just enough sweetness without overpowering the natural flavors of the ingredients.
They’re also incredibly versatile.
You can enjoy them with fresh fruit, chopped nuts or even a spoonful of yogurt.
Another thing I love is that they can be prepared ahead of time.
Simply allow any leftover pancakes to cool completely before storing them in an airtight container in the refrigerator for up to three days.
You can also freeze them in individual portions for a convenient breakfast during the week.
When you’re ready to eat, warm them in a toaster or skillet until heated through.
It’s a simple way to enjoy a homemade breakfast without having to prepare everything from scratch each morning.
Eating healthier shouldn’t mean eliminating every food that brings you joy.
Sometimes it’s simply about making a few thoughtful changes to the ingredients while keeping everything you love about the original recipe.
These pancakes are proof that a nutritious breakfast can still feel comforting, delicious and a little indulgent.
Because healthy food doesn’t have to feel like a compromise.
And sometimes, a warm stack of fluffy pancakes is exactly how you want to start your morning.
For more recipes like this, check out our WholeRoots Recipe app:
Cozy & Healthy Gluten-Free Lentil Soup.
One thing I’ve learned since becoming more intentional about what I eat is that healthy options can taste good, too.
There’s this idea that eating healthier means giving up flavor or forcing yourself to eat meals you don’t actually enjoy. I don’t believe that at all.
For me, making healthier choices has been about finding foods that are nourishing, satisfying and genuinely delicious. If I’m going to make something again and again, it has to be something I actually look forward to eating.
That’s exactly what this lentil soup is.
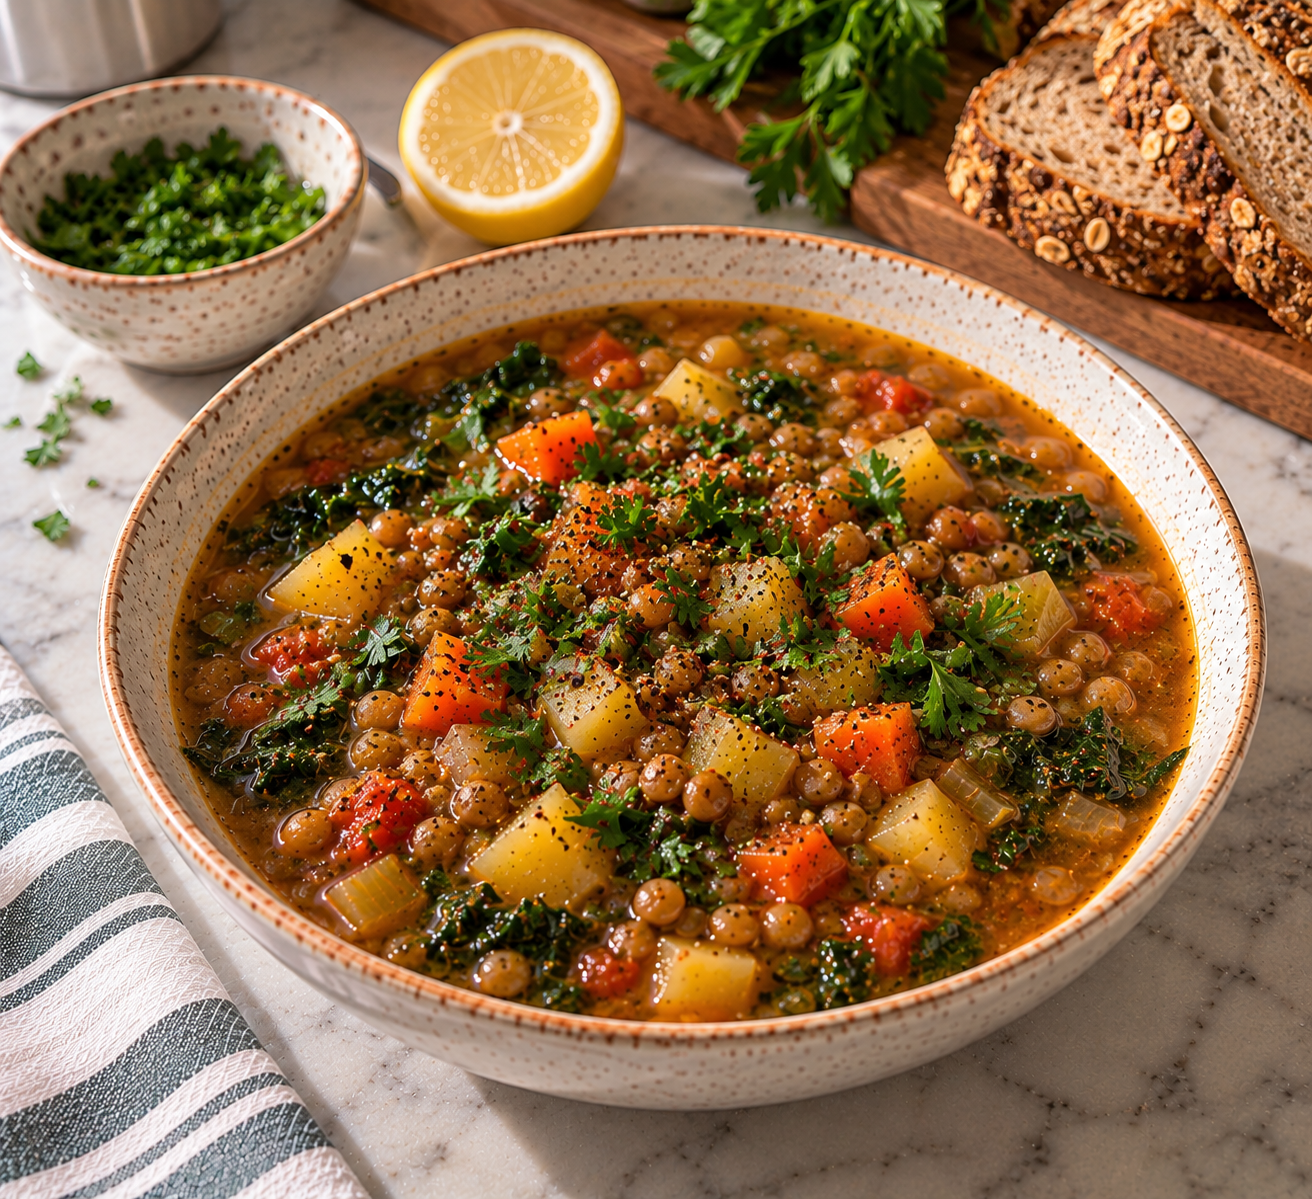
It’s warm, hearty and full of flavor from garlic, vegetables, herbs and spices. The lentils make it filling and satisfying, while fresh lemon at the end brightens everything up.
It doesn’t taste like something I’m eating simply because it’s “healthy.” It tastes like a comforting bowl of homemade soup that just happens to be made with ingredients that are good for you.
This lentil soup is naturally gluten-free, packed with plant-based protein and fiber and full of vegetables.
Most importantly, it tastes good.
Here is my healthy gluten-free lentil soup.
Healthy Gluten-Free Lentil Soup
Prep time: 15 minutes
Cook time: 35–40 minutes
Total time: 50–55 minutes
Servings: 6
Ingredients
For the Soup
2 tablespoons extra-virgin olive oil
1 medium yellow onion, diced
2 medium carrots, peeled and diced
2 celery stalks, diced
3 cloves garlic, minced
1 teaspoon ground cumin
1 teaspoon smoked paprika
½ teaspoon ground turmeric
½ teaspoon dried thyme
¼ teaspoon red pepper flakes, optional
1½ cups dried green or brown lentils, rinsed and sorted
6 cups low-sodium vegetable broth, certified gluten-free
1 cup water, plus more as needed
1 bay leaf
1 medium Yukon Gold potato, diced into small pieces
2 cups chopped kale or spinach
1 tablespoon fresh lemon juice, plus more to taste
½ teaspoon salt, or to taste
Freshly ground black pepper, to taste
2 tablespoons chopped fresh parsley, for serving
Instructions
Start by preparing your vegetables.
Dice the onion, carrots, celery and potato, mince the garlic and rinse the lentils thoroughly under cold water.
Heat the olive oil in a large soup pot or Dutch oven over medium heat.
Add the onion, carrots and celery and cook for approximately 5–7 minutes, stirring occasionally, until the vegetables begin to soften.
Add the garlic and cook for another 30–60 seconds, just until fragrant.
Stir in the cumin, smoked paprika, turmeric, dried thyme and red pepper flakes.
Allow the spices to cook with the vegetables for about 30 seconds. This helps bring out their flavor before you add the liquid.
Add the rinsed lentils, vegetable broth, water, bay leaf and diced potato.
Stir everything together and bring the soup to a gentle boil.
Once boiling, reduce the heat to low, partially cover the pot and allow the soup to simmer for approximately 30–35 minutes.
Stir occasionally while the soup cooks.
The lentils should become tender and the potatoes should be easily pierced with a fork. If the soup becomes thicker than you like, add a little more water or broth until it reaches your preferred consistency.
Once the lentils are tender, remove and discard the bay leaf.
Stir in the kale or spinach and allow it to cook for another 2–3 minutes, or until the greens have softened.
Finish the soup with fresh lemon juice, salt and freshly ground black pepper.
Taste and adjust the seasonings as needed.
I love adding a little extra lemon at the end because the acidity brightens all of the earthy flavors from the lentils and spices.
Ladle the soup into bowls and finish with fresh parsley.
Serve warm.
Optional Additions
One of my favorite things about lentil soup is how easy it is to customize.
For even more vegetables, try adding zucchini, sweet potato, mushrooms or chopped bell peppers.
If you want the soup to have a creamier texture without adding cream, remove about two cups of the cooked soup, blend until smooth and stir it back into the pot.
You can also add a pinch of cayenne or extra red pepper flakes if you like a little heat.
For serving, try adding sliced avocado, fresh herbs or a spoonful of plain Greek yogurt.
And if you want something crunchy on the side, serve it with your favorite gluten-free bread.
Just remember to check the labels on your broth, spices and any packaged ingredients to make sure they’re certified or labeled gluten-free when necessary.
Healthy Food Should Still Taste Good
Eating healthier has made me realize that I’m much more likely to stick with the choices I make when I actually enjoy the food.
I don’t want meals that leave me thinking about everything I would rather be eating.
I want food that feels comforting and satisfying while still giving my body something nourishing.
That’s what I love about this soup.
The lentils and potatoes make it hearty, the vegetables add texture and freshness, and the cumin, smoked paprika, garlic and herbs give the broth plenty of flavor.
It’s simple, naturally gluten-free and easy enough to make in one pot.
It’s also one of those meals that tastes even better the next day after all of the flavors have had time to come together.
Healthy food doesn’t have to feel like a compromise.
Sometimes the healthiest option can also be the thing you genuinely want to eat.
For more recipes like this, check out our WholeRoots Recipe app:
https://apps.apple.com/app/id6749336989
9 Reasons that I am grateful.
Written by Hali Tsotetsi
Photo from Unsplash

What I love about life is that it’s mostly deciphered by how you look at it. Of course, we can go through difficult times and move through negative experiences accordingly; I don’t want to push toxic positivity.
However, in general, life becomes more tolerable and manageable when your mindset is one of gratitude. That’s why I practice gratitude in my daily life and make sure to remember certain things that I am grateful for.
Here are 9 reasons that I am grateful:
1. To wake up and breathe.
2. For a roof over my head and a place to live.
3. For my friends.
4. For my family.
5. That I live near water and nature.
6. That I am able to practice yoga and workout almost everyday.
7. For all the laughs that I have had.
8. For all the challenging times that I have had.
9. Another chance to learn through the school of life.
A Healthy Gluten-Free Lettuce-Wrap Burger.
Over the past several months, I’ve made some health choices for my overall health. This has completely changed my relationship with food.
One of the biggest things I’ve realized is that I don’t want to spend my life feeling like I’m on a diet. I still want to go out, enjoy food and make the meals I love at home. I’ve just become more intentional about what goes into my body.
I also know myself well enough to know that if something doesn’t taste good, I’m not going to keep eating it just because it’s considered “healthy.”
That’s how I started making burgers like this one.
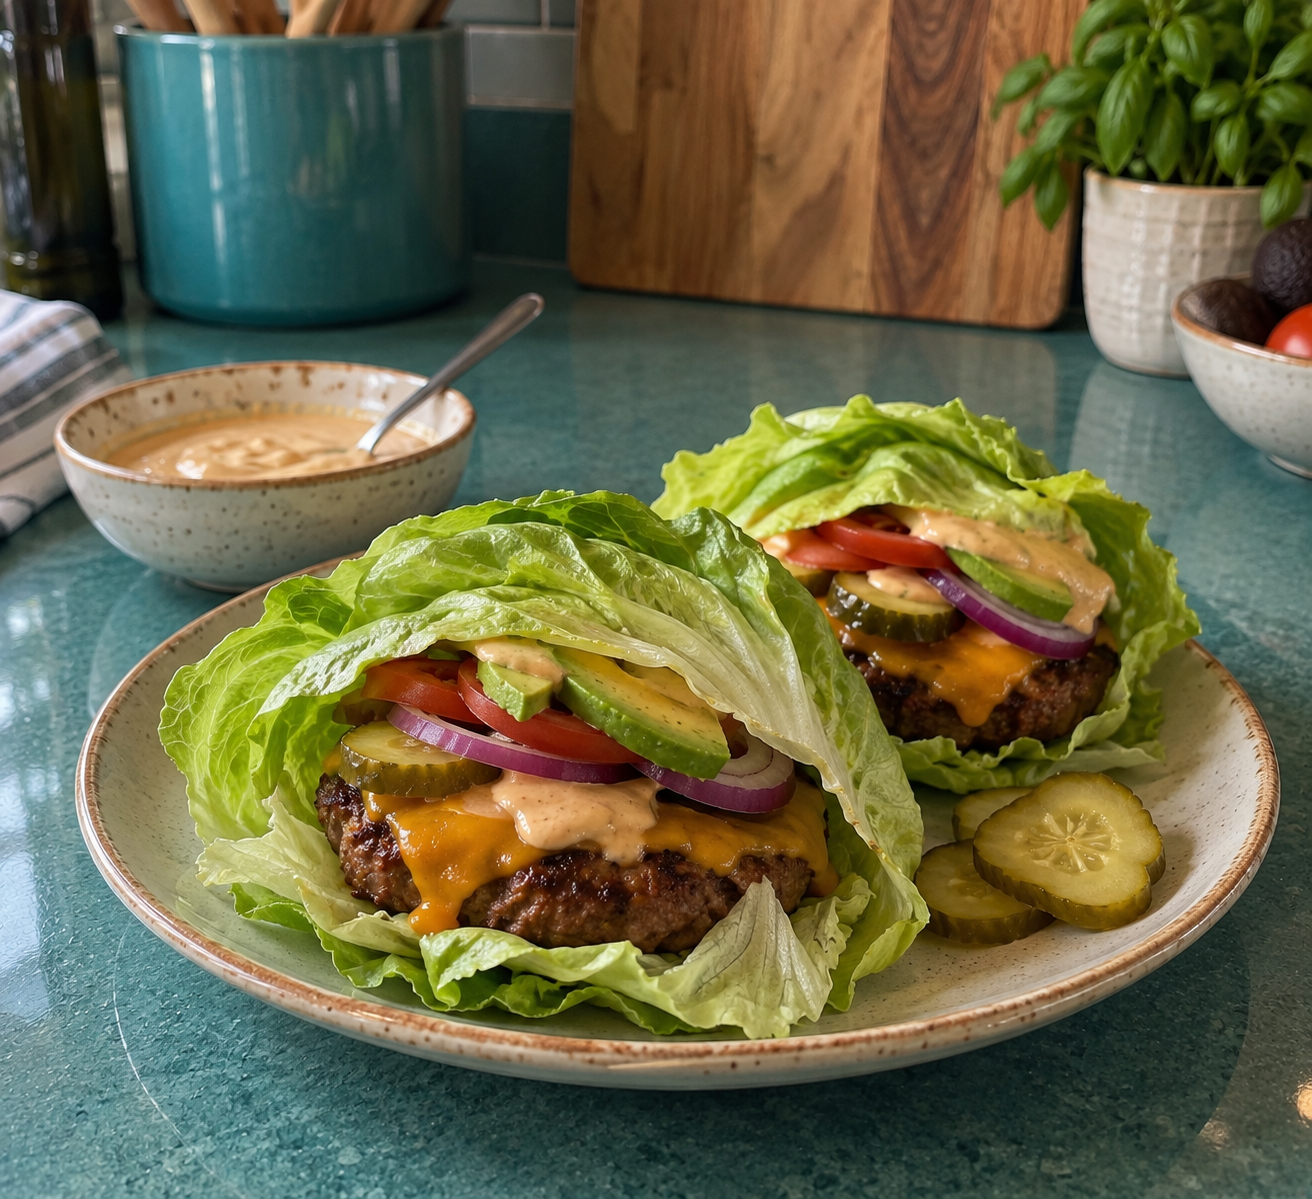
I wasn’t trying to reinvent the burger or turn it into something completely different. I wanted the juicy patty, melted cheese, crunchy toppings and creamy sauce—just in a version that felt a little lighter for me.
Swapping the bun for crisp lettuce was such a simple change, but it worked.
This lettuce-wrap burger is fresh, filling, naturally gluten-free and packed with protein, but most importantly, it’s something I genuinely enjoy eating.
Here is my healthy lettuce-wrap burger.
Healthy Gluten-Free Lettuce-Wrap Burger
Prep time: 10 minutes
Cook time: 10–12 minutes
Total time: 20–22 minutes
Servings: 4
Ingredients
For the Burgers
1 pound lean ground beef, preferably 90–93% lean
1 teaspoon garlic powder
1 teaspoon onion powder
½ teaspoon smoked paprika
½ teaspoon salt
¼ teaspoon freshly ground black pepper
1 teaspoon olive or avocado oil, if needed for cooking
4 slices cheddar cheese, optional
For the Lettuce Wraps
1 large head iceberg or butter lettuce
½ small red onion, thinly sliced
1 small cucumber, thinly sliced
¼ cup sliced pickles
1 avocado, sliced
For the Burger Sauce
¼ cup plain Greek yogurt
1 tablespoon Dijon mustard
1 tablespoon ketchup
1 teaspoon pickle juice
½ teaspoon garlic powder
Freshly ground black pepper, to taste
Instructions
Start by preparing the lettuce.
Carefully remove 8 large lettuce leaves, keeping them as intact as possible. Wash and dry them thoroughly. Use two overlapping leaves for each burger to create a sturdy wrap.
Set the lettuce aside while you prepare the burgers.
Add the ground beef (or turkey) to a mixing bowl and season with the garlic powder, onion powder, smoked paprika, salt and black pepper.
Gently mix the seasonings into the meat, being careful not to overwork it.
Divide the beef into four equal portions and shape each portion into a burger patty. Press a small indentation into the center of each patty with your thumb to help the burgers cook evenly.
Heat a large skillet or grill pan over medium-high heat.
If necessary, lightly coat the pan with olive or avocado oil.
Add the burger patties and cook for approximately 4–5 minutes on the first side.
Flip and cook for another 3–5 minutes, or until the burgers reach your preferred doneness and an internal temperature of 160°F.
If you are adding cheese, place one slice over each burger during the final minute of cooking. Cover the pan briefly to allow the cheese to melt.
Remove the burgers from the heat and allow them to rest for a few minutes.
While the burgers rest, prepare the sauce.
Combine the Greek yogurt, Dijon mustard, ketchup, pickle juice, garlic powder and black pepper in a small bowl. Stir until smooth and creamy.
To assemble each burger, overlap two large lettuce leaves.
Place the burger patty in the center and top with sliced red onion, cucumber, pickles, avocado and a spoonful of burger sauce.
Fold the lettuce around the burger and serve immediately.
Optional Toppings
One of my favorite things about burgers is that you can really make them your own.
Try adding sautéed mushrooms, caramelized onions, jalapeños, turkey bacon or your favorite cheese.
For extra crunch, you can add shredded cabbage or thinly sliced radishes.
If you like a little heat, add hot sauce or chili flakes to the burger sauce.
A Burger Doesn’t Need a Bun to Be Good
Making healthier choices has taught me that I don’t have to completely change the foods I love to make them work for me.
Sometimes I want a traditional burger with the bun and everything that comes with it.
Other times, I want something lighter that still feels satisfying.
That’s exactly what this burger gives me.
You still get the juicy beef, melted cheese, creamy sauce and crunchy toppings. The lettuce simply adds a fresh, crisp element that works surprisingly well with everything else.
It’s simple, filling, naturally gluten-free and easy enough to make whenever I’m craving a burger at home.
Sometimes a healthier choice doesn’t have to feel like a sacrifice.
It can be as simple as finding a version of something you already love.
For more recipes like this, check out our WholeRoots Recipe app:
Dear Hater…
Written by Hali Tsotetsi
Image from Unsplash

Dear Hater,
I know you because I used to be you. However, growth and maturity has taught me that living in hate is only a burden on my life.
So, when you gossip about me, spread lies about others and revel in misery. I know that it has nothing to do with anyone but, the war you have going on with yourself.
I know that your smile is insincere and, you have never liked me- which is okay. I don’t take it personally. As I once had an internal battle with myself, I see that you are in on right now.
Hopefully, you will free yourself of the chains of negativity and pessimism but until then, every lie or action towards me or anyone else that is rooted in misery and hatred; I know has nothing to do with me. I free myself from ever thinking I was the cause of any of it.
We treat others how we feel about ourselves and our lives are a reflection of our thoughts and beliefs. I have chosen to think positively and I hope one day, you do the same.
Healthy Vegan & Gluten-Free Sweet Potato Pie (Naturally Sweetened).
Written by Hali Tsotetsi
I have shared recently that I lost 30 pounds, and since then, I’ve been thinking a lot about what actually made that change sustainable for me.
It wasn’t about giving up every food I love or trying to make every meal perfectly “healthy.” A big part of it was learning how to rethink some of my favorite foods and make them with ingredients that fit better into the way I eat now.
And I definitely wasn’t interested in giving up dessert.
Sweet potato pie is already built around an ingredient that is naturally sweet, creamy and delicious, so I wanted to see how simple I could make it without losing what makes a good sweet potato pie so comforting.
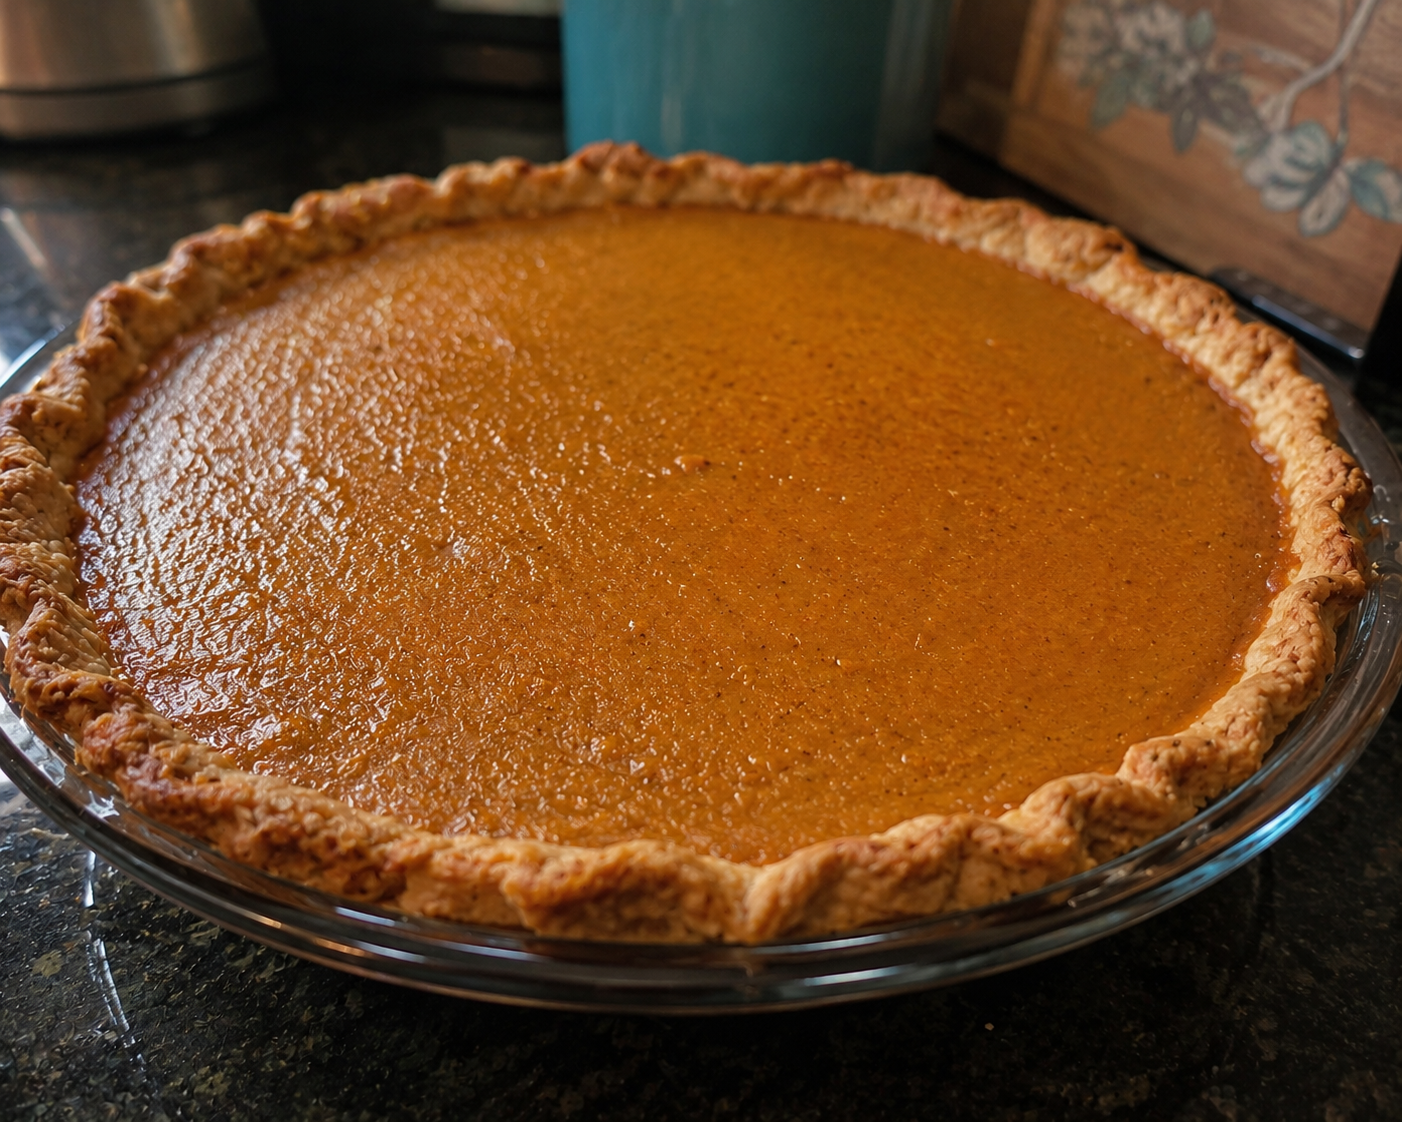
This version is vegan, gluten-free and made without refined sugar. Instead, the sweetness comes from the sweet potatoes themselves and pure maple syrup, with cinnamon, nutmeg and vanilla bringing in those classic warm flavors.
The result is a creamy, rich sweet potato pie that still feels like an actual dessert—not a “healthy” substitute you have to convince yourself to enjoy.
Here is my healthy vegan and gluten-free sweet potato pie.
Healthy Vegan & Gluten-Free Sweet Potato Pie
Prep time: 25 minutes
Bake time: 50–60 minutes
Cooling time: 2–3 hours
Servings: 8
Ingredients
For the Gluten-Free Crust
1½ cups almond flour
½ cup certified gluten-free oat flour
¼ teaspoon salt
¼ teaspoon cinnamon
3 tablespoons pure maple syrup
¼ cup melted coconut oil
1–2 tablespoons cold water, if needed
For the Sweet Potato Filling
2 cups cooked and mashed sweet potato
¾ cup full-fat canned coconut milk
⅓ cup pure maple syrup
2 tablespoons cornstarch or arrowroot starch
2 tablespoons melted coconut oil
2 teaspoons pure vanilla extract
1½ teaspoons ground cinnamon
½ teaspoon ground nutmeg
¼ teaspoon ground ginger
¼ teaspoon salt
Small pinch of ground cloves, optional
Instructions
Preheat the oven to 350°F.
Start by preparing the crust. Add the almond flour, oat flour, salt and cinnamon to a mixing bowl and stir until combined.
Pour in the maple syrup and melted coconut oil. Mix until the ingredients begin to form a soft, slightly crumbly dough. If the mixture feels too dry to hold together when pressed, add cold water one tablespoon at a time.
Press the crust evenly into the bottom and up the sides of a 9-inch pie dish.
Bake the crust for 8–10 minutes, just until it begins to look lightly golden around the edges. Remove it from the oven and allow it to cool slightly while you prepare the filling.
For the filling, add the mashed sweet potato, coconut milk, maple syrup, cornstarch or arrowroot starch, coconut oil, vanilla, cinnamon, nutmeg, ginger, salt and cloves to a blender or food processor.
Blend until completely smooth and creamy, scraping down the sides as necessary.
Pour the filling into the prepared crust and smooth the top with a spatula.
Bake for 45–50 minutes, or until the edges are set and the center still has a very slight jiggle.
Remove the pie from the oven and allow it to cool completely at room temperature.
Transfer the pie to the refrigerator and chill for at least 2 hours before slicing. This is important because the filling will continue to set as it cools.
Serve chilled or at room temperature.
Optional Toppings
For an extra-special finish, top each slice with coconut whipped cream, a sprinkle of cinnamon or a few chopped pecans.
You can also drizzle a small amount of pure maple syrup over the top if you prefer a sweeter dessert.
A Healthier Dessert That Still Feels Like Dessert
I don’t believe a healthier lifestyle has to revolve around constantly telling yourself what you cannot have.
For me, it has been much more sustainable to look at the foods I genuinely enjoy and find ways to make them work with the way I want to eat now.
This sweet potato pie is a perfect example.
It is creamy, naturally sweet and filled with the cinnamon, nutmeg and vanilla flavors that make sweet potato pie so comforting in the first place. It just happens to be vegan, gluten-free and made without refined sugar.
Sometimes eating well is not about removing dessert from the table.
It is about changing what goes into it.
For more recipes like this, check out our WholeRoots Recipe app:
Healthy Overnight Oats Recipe: 6 Easy Variations for a Delicious Make-Ahead Breakfast.
Written by Hali Tsotetsi
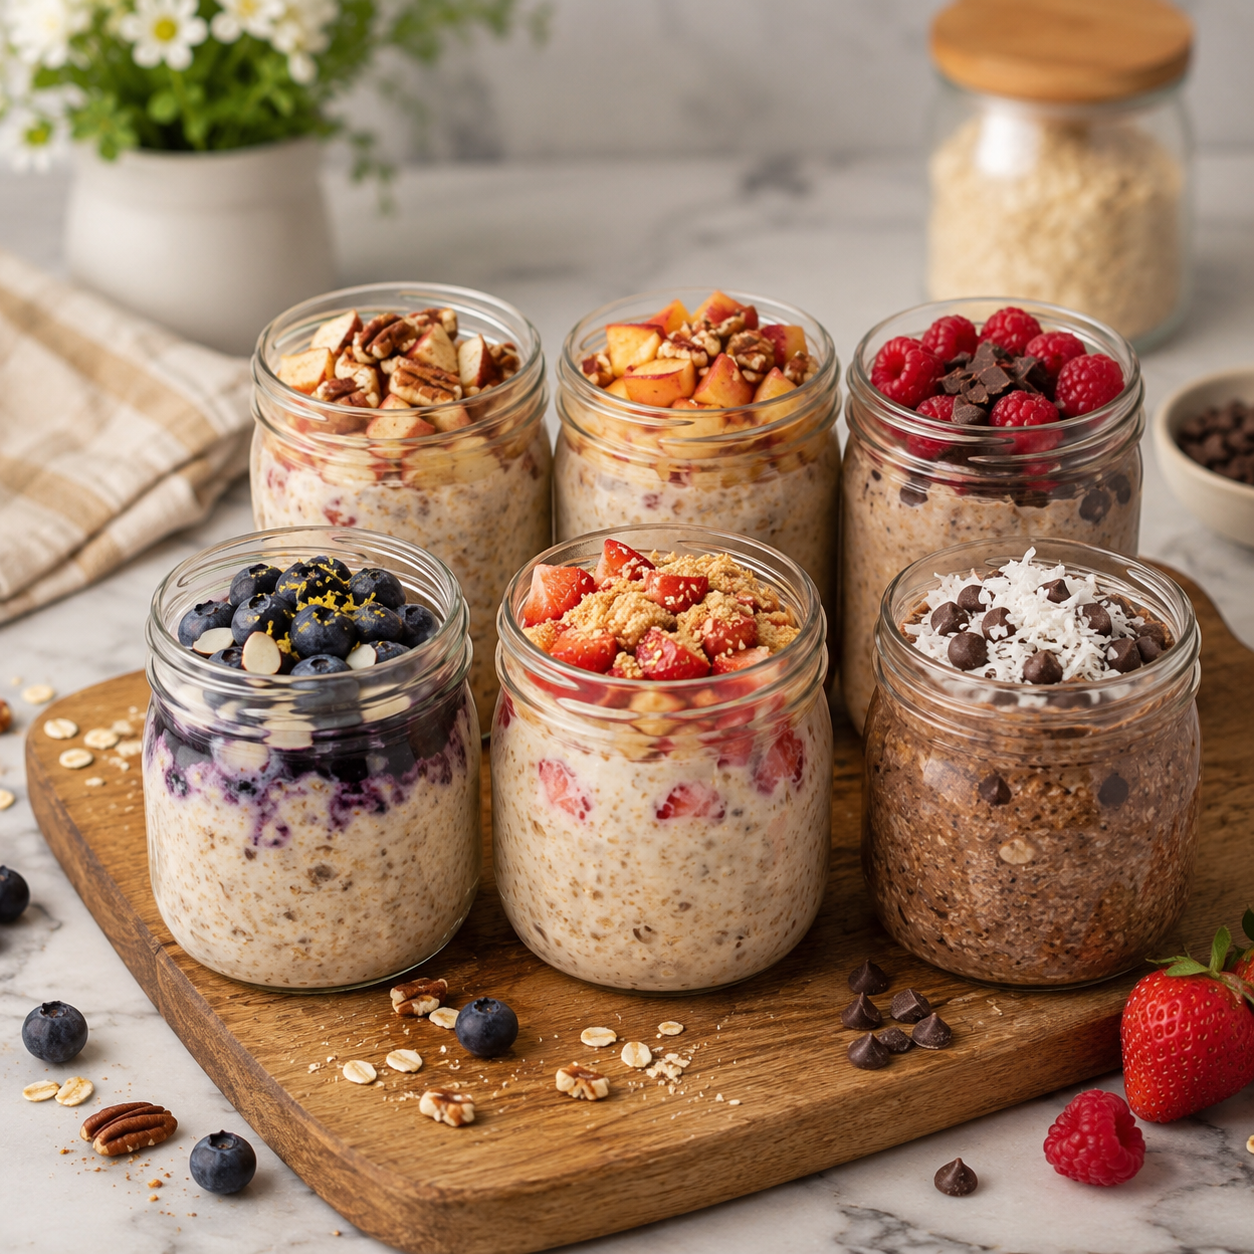
I have been on a health journey and recently lost 30 pounds. Along the way, I’ve learned that eating well doesn’t have to mean complicated recipes, restrictive meals or sacrificing the foods I genuinely enjoy.
One of the biggest changes I’ve made is finding simple meals that are satisfying, nourishing and realistic enough to become part of my everyday routine. Overnight oats check every one of those boxes.
They are quick to prepare and don’t require slaving away in the kitchen to get your day started. This easy recipe can also be made in a few different variations, in case you get bored with eating the same breakfast every morning.
Here is my go-to overnight oatmeal recipe, plus six variations to keep things interesting.
Basic Healthy Overnight Oats
Prep time: 5 minutes
Chill time: 6–8 hours
Servings: 1
Ingredients
½ cup old-fashioned rolled oats
½ cup milk of choice
¼ cup plain or vanilla Greek yogurt
1 tablespoon chia seeds
1–2 teaspoons pure maple syrup or honey
½ teaspoon vanilla extract
Small pinch of salt
Instructions
Add the rolled oats, milk, Greek yogurt, chia seeds, maple syrup or honey, vanilla and salt to a jar or airtight container.
Stir thoroughly, making sure the chia seeds are evenly distributed throughout the mixture.
Cover and refrigerate for at least six hours, preferably overnight.
In the morning, give everything another good stir. If you prefer a thinner consistency, add a splash of milk until the oatmeal is exactly how you like it.
Enjoy it straight from the refrigerator or warm it gently if you prefer a cozy breakfast.
Six Easy Overnight Oat Variations
The beauty of overnight oats is that the basic recipe is only the beginning. A few small additions can completely change the flavor, making it much easier to avoid breakfast boredom.
1. Strawberry Cheesecake Overnight Oats
Creamy, fruity and just indulgent enough to make an ordinary weekday morning a little more interesting.
Add to the basic recipe:
½ cup chopped strawberries
1 tablespoon cream cheese
½ teaspoon fresh lemon zest
Mix the cream cheese into the milk and yogurt before adding the remaining ingredients. Fold in the strawberries and refrigerate overnight.
In the morning, top with additional fresh strawberries and a small sprinkle of crushed graham crackers.
2. Blueberry Lemon Overnight Oats
This combination is bright, fresh and particularly lovely during warmer months.
Add:
½ cup blueberries
½ teaspoon fresh lemon zest
1 teaspoon fresh lemon juice
1 tablespoon sliced almonds
Gently crush a few of the blueberries before mixing them into the oats. This releases some of their juice and adds natural blueberry flavor throughout the mixture.
Refrigerate overnight and add the sliced almonds just before serving.
3. Apple Cinnamon Pecan Overnight Oats
There is a reason apple and cinnamon never seem to go out of style. This version brings some of the flavors of apple pie into a much simpler breakfast.
Add:
½ small apple, finely diced
½ teaspoon cinnamon
Pinch of nutmeg
1 teaspoon maple syrup
1 tablespoon chopped pecans
Mix the apple, cinnamon, nutmeg and maple syrup into the oatmeal before refrigerating.
Add the chopped pecans in the morning so they stay crunchy.
4. Chocolate Coconut Overnight Oats
For those mornings when plain oatmeal simply will not do.
Add:
1 tablespoon unsweetened cocoa powder
2 tablespoons shredded coconut
1–2 teaspoons maple syrup
1 tablespoon dark chocolate chips or chopped dark chocolate
Whisk the cocoa powder into the milk first to help prevent lumps. Add the remaining ingredients and refrigerate overnight.
Finish with a little extra shredded or toasted coconut and dark chocolate before serving.
5. Peaches & Cream Overnight Oats
Soft peaches and creamy yogurt make this variation simple, sweet and refreshing.
Add:
½ cup diced fresh or frozen peaches
¼ teaspoon cinnamon
1 tablespoon chopped pecans
Extra spoonful of Greek yogurt for serving
Fold the peaches and cinnamon into the oatmeal before refrigerating.
In the morning, finish with an extra spoonful of Greek yogurt, a few peach slices and chopped pecans.
6. Raspberry Dark Chocolate Overnight Oats
Fresh raspberries and dark chocolate make this one feel slightly more sophisticated while still being incredibly easy to prepare.
Add:
½ cup raspberries
1 tablespoon dark chocolate chips or finely chopped dark chocolate
½ teaspoon vanilla extract
1 teaspoon maple syrup
Lightly mash half of the raspberries into the oat mixture and leave the remaining berries whole.
Refrigerate overnight and add the dark chocolate just before serving.
How to Make the Best Overnight Oats
For the best texture, I recommend using old-fashioned rolled oats. They soften beautifully overnight without completely losing their texture. Instant oats can become overly soft, while steel-cut oats generally require a different preparation method and longer soaking time.
Chia seeds are another small ingredient that makes a noticeable difference. They absorb some of the liquid overnight, helping to create a thick and creamy consistency.
If you are preparing several breakfasts at once, make a few jars of the basic recipe and give each one a different flavor. You can have strawberry cheesecake one morning, apple cinnamon the next and chocolate coconut waiting for you later in the week.
Keep crunchy toppings such as nuts, granola, toasted coconut and chocolate separate until you are ready to eat. Nobody is asking for soggy pecans at 8 a.m.
Make It Your Own
The best thing about overnight oatmeal is that you really do not need to follow the recipe religiously.
Prefer your oatmeal sweeter? Add a little more maple syrup or honey. Want more fruit? Add it. Prefer a thicker consistency? Reduce the milk slightly. If you like your oats looser and creamier, add an extra splash.
Think of the basic recipe as your starting point and experiment from there.
My health journey has taught me that sustainable changes do not always come from dramatic overhauls. Sometimes they come from finding simple, nourishing foods you genuinely enjoy and making them part of your routine.
And if breakfast is already sitting in the refrigerator waiting for you, that is one less decision to make in the morning.
For more, check out our Meal Plan App: https://apps.apple.com/app/id6749336989
3 Rituals that keep me at peace.
Written by Hali Tsotetsi
Image from Unsplash

One could say that the point of life is to struggle, overcome and, become a better version of yourself. Although that could be argued, that is the optimistic way to carry oneself throughout this lifelong journey.
If we become bitter and jaded, it makes it harder to see a path forward. While it is not easy, I try to make a habit of practicing positivity. And while, the negative voice does show up in my head sometimes; I encourage that thought to align with positivity.
It’s not always easy and, sometimes I do fail at it. But, trying and practicing to see the positive in life and kindness in people is a challenge that only rewards me and the path in my life afterwards.
Here are 3 Rituals that keep me at peace:
1. Meditation.
Ten years ago, I attended The Institute of Integrative Nutrition and, something that they encouraged us to practice is meditation. Although I have been practicing yoga (which usually goes hand-in-hand with meditation) since I was 14 years old, I found it difficult to sit and do nothing.
Ten years later, I make sure to meditate at least ten minutes in the morning everyday. Otherwise, I feel like I haven’t brushed my teeth. Grounding myself in meditation reminds me to regulate my emotions and become the observer of my actions without judgement.
This practice allows me to sit in stillness, which is the very definition of peace.
2. Yoga
Yoga has quite literally become my best friend for the past almost two decades. While I have moved cities, countries, states and, relationship statuses, Yoga has always been there for me. While it is also a self-regulation tool, it has connected me to my inner self for deep reflection.
It has forced me to face my darkest self and allowed me to shine bright. From helping me to detach from looping negative thoughts to creating healthy physical habits, Yoga has helped me find internal and external peace.
3. Prayer
While I am not religious in any capacity, I feel very connected to Source. To me, religions have weaponized this energy for Egoic purposes. But, this powerful energy is a guiding force that leads Spirit and Angels who are working in the light to help us, teach us or enlighten us.
I pray every night out of gratitude for where I could’ve been without belief, from humility as I understand that I have a lot to learn and, from peace because I feel protected by this Source.
Why do I want to forgive him?
Written by Hali Tsotetsi
Image from Unsplash

Why do I want to forgive him?
Because I was honest and vulnerable. And, he didn’t know how to receive it.
I want to forgive him because although I am disappointed and feel betrayed. Not having him in my life is for the best.
I want to forgive him because recounting memories of him lying to me will not do me any good. As much as I want to continue to blame him, I choose to move on with my life.
I want to forgive him because I expected him to be there for me when he can’t even be there for himself.
I forgive him because my anger towards him has served its purpose and now, there is no need for it anymore.
I forgive him because life is too good to live it upset over something that I have no control over. I could spend the rest of my life demonizing him but, all of that would be a complete waste.
I forgive him because I choose peace, joy and happiness. Hate has no place in my life anymore.
Dear Inner Child,
Written by Hali Tsotetsi
Image from Unsplash

Dear Inner Child,
When life gets tough, that is when it’s time to lean inwards. With that inner direction, align yourself with what you believe to be authentic. There are a lot of fakers in this world. Your job is not to call them out but remain on your own path because calling them out is tiresome, gruesome and tedious.
Know that your boundaries are worth upholding. You are not too much, you are not too little and you are not less than so don’t believe other people’s judgments and limitations.
You are exactly where you are meant to be. You might’ve said the wrong thing, done it the incorrect way or just messed up and, that is okay. You don’t have to be the best or be perfect. You just have to take it day-by-day. Live today!
When your doubt creeps back up about something that didn’t go your way or someone who hurt/betrayed you, know that believing in someone’s heart is an act of purity. It is on them for not fulfilling what they pretended or claimed to be. The only thing you can do is trust, the rest is up to other people and what The Divine has in store for you.
Look at your mistakes or flaws as pathways to where you can fine-tune and learn more about yourself, not as memories that you keep rehashing in your head. The past is over, there is nothing you can do about it. You might’ve not acted your best or behaved perfectly but, how were you meant to know? That is what experience is, gaining knowledge through living.
Live your life, not for pictures or to say you did it but to feel it. Smell the air, cry the pain, feel the hurt, rejoice in the laughter, heal your heart, believe in people, trust yourself. You are meant to be alive for a reason.
That reason is to live.
How I am healing my relationship with food.
Written by Hali Tsotetsi
Image from Unsplash
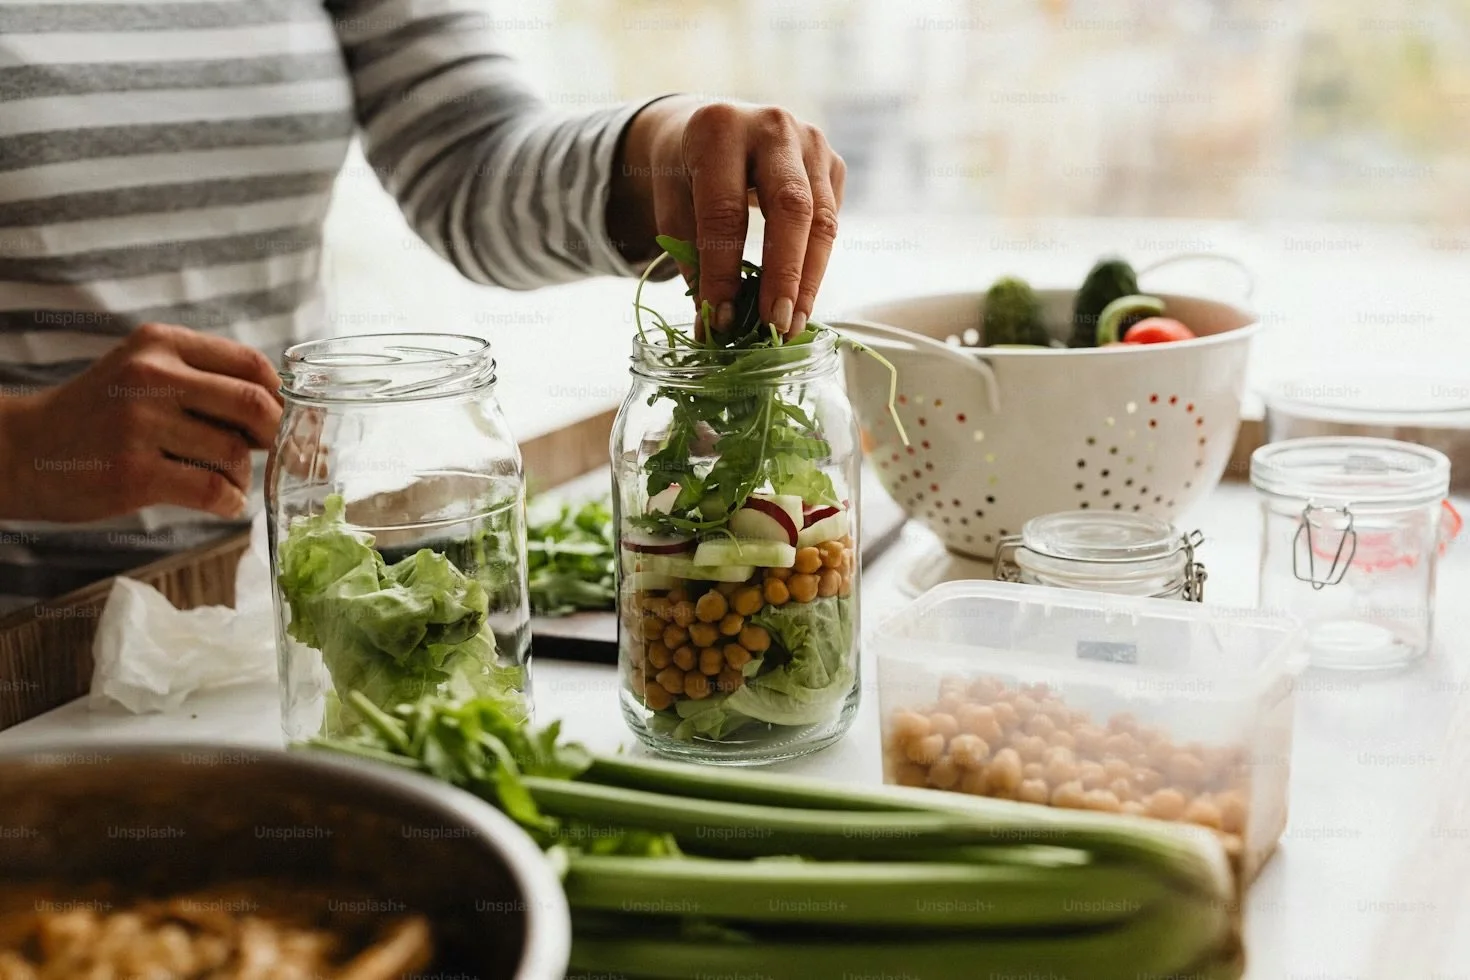
About a month ago, I was feeling fatigued, sluggish and bloated. I felt a deep disconnection from my body and, as a former dancer and yoga teacher, this is an odd experience for me.
I felt my clothes getting smaller but I have been active and working out. So, I was confused about why I felt so heavy. This led me to do one of the things that I needed but really didn’t want to, to buy a scale and weigh myself.
I almost cried when I saw the number on the scale because it was way more than I had wanted to see. After I processed the number in my head, I got honest with myself about what I had been putting in my mouth. I was so disappointed in myself because I had been doing so well until I went through something in the past months that led me to overeat.
You see, I have never had substance abuse issues, drinking issues but, my addiction has always been food. Whenever I go though a tough time, I find myself leaning on food to help me get through any emotional issues that I need to process in a healthy way.
Growing up, my weight would yo-yo. I would go months without eating and then go overeat to compensate for the months that I had deprived myself of food. I would notice that when I was skinny, people would treat me differently and were nicer to me. However, when I was overweight, I wouldn’t get the same treatment. I developed a frenemy relationship with food. It made me feel good but would make look heavy, tired and bloated.
As I grew up, into early adulthood, I did a lot of yoga which suppressed my appetite. So, I was skinny and fit into my clothes the way that I had wanted. The worst part of being overweight is not fitting your clothes properly.
Then after, I went through a really bad break-up (in my late twenties) and a miscarriage, I put on a bunch of weight on. Although I subconsciously knew that I had used food as a way to numb my feelings, it wasn’t until three weeks ago when I felt myself feeling a deep emotion and linked that feeling to a craving for potato chips. I had a deep ‘aha’ moment.
I realized that I had leaned on food as a way to help me digest my emotions, instead of just processing it. So, in that moment, I gave myself permission to feel and be upset with the person that I was angry with. I sat with it and the craving went away.
As I have lost some of the weight, I am in the process of healing how I have used food (particularly chips, snacks and large portions of food) to heal what I just needed to feel. My inner child was not given permission to feel my true emotions but, now I am allowing her to do so.
In a respectful manner, I will not push down any feelings, intuition or hunches that I have about someone or something. I deserve to feel the way that I feel. No one can tell me otherwise
These almond butter chocolate coconut bars celebrate richness and simplicity
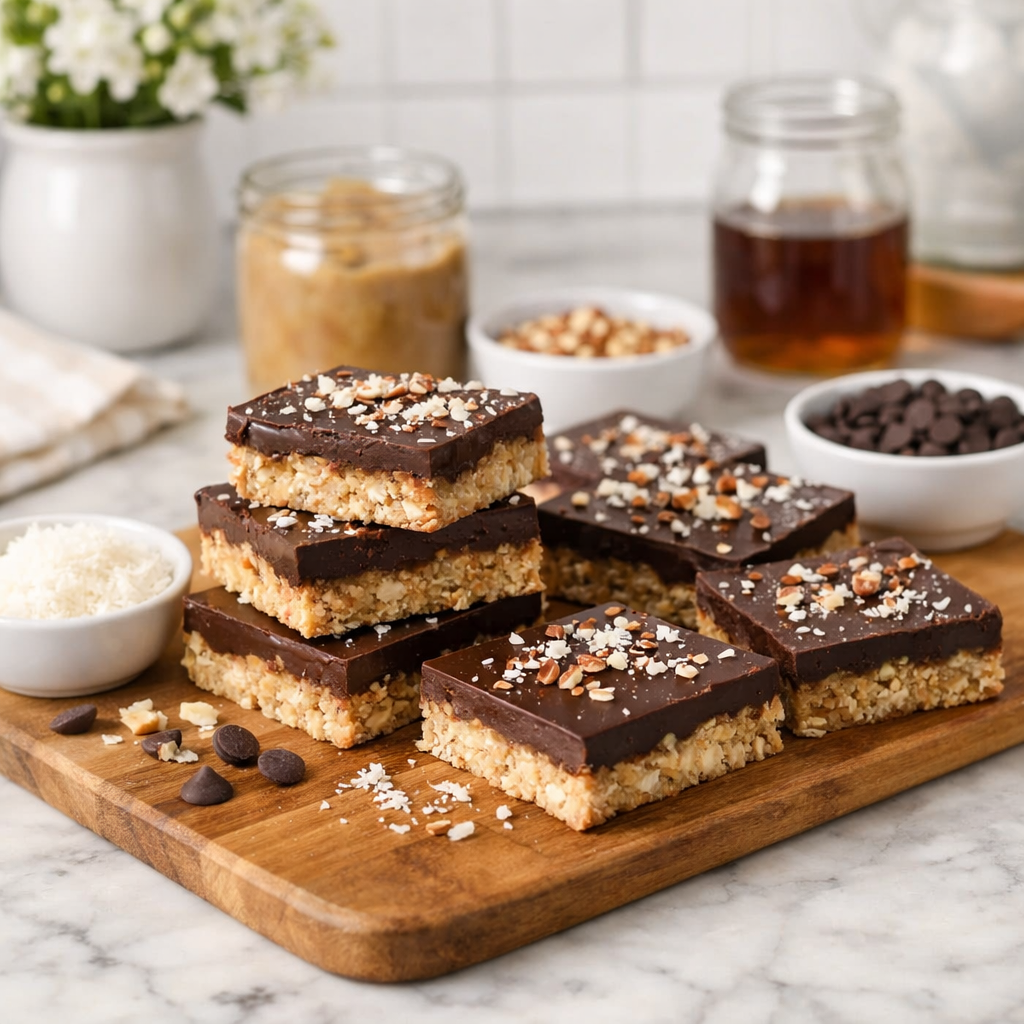
Sweet treats don’t have to rely on refined flour or processed sugars to feel indulgent and comforting. In a world where dessert is often associated with excess, simple whole-food ingredients can transform everyday moments into something both nourishing and delicious.
These almond butter chocolate coconut bars celebrate richness and simplicity. Naturally gluten-free and made with wholesome ingredients like almond butter, coconut, and dark chocolate, they deliver a satisfying balance of creamy, nutty, and lightly sweet flavors. It’s the kind of dessert that feels decadent yet nourishing—perfect as an afternoon pick-me-up, a post-dinner treat, or a beautiful addition to a wellness-focused lifestyle.
Ingredients (Makes 8–10 bars)
Base Layer:
• 1 cup almond butter (smooth and unsweetened)
• ¼ cup pure maple syrup
• 1 teaspoon vanilla extract
• 1 cup unsweetened shredded coconut
• ¼ teaspoon sea salt
Chocolate Topping:
• ½ cup dark chocolate chips (70% cacao or higher, gluten-free)
• 1 tablespoon coconut oil
• 1 tablespoon chopped almonds or shredded coconut (optional garnish)
Instructions:
Prepare the base mixture
In a medium bowl, mix almond butter, maple syrup, vanilla extract, shredded coconut, and sea salt until well combined and slightly thick.Press into the pan
Line a small baking dish (about 8×8 inches) with parchment paper. Press the mixture evenly into the pan to form a compact base layer.Melt the chocolate topping
In a small heatproof bowl, melt dark chocolate chips and coconut oil together using a microwave in 20-second intervals or over a double boiler, stirring until smooth.Add the chocolate layer
Pour the melted chocolate evenly over the almond coconut base. Spread gently with a spatula.Chill until firm
Sprinkle chopped almonds or shredded coconut on top if desired. Place the pan in the refrigerator for about 45–60 minutes until the chocolate is fully set.Slice & enjoy
Remove from the refrigerator, lift out using the parchment paper, and slice into bars or squares.
Serving & Storage Tips
• Enjoy straight from the refrigerator for a firmer, fudge-like texture
• Store in an airtight container in the refrigerator for up to 5 days
• These bars can also be frozen for up to 2 months
• For extra flavor, add a sprinkle of flaky sea salt or drizzle with melted almond butter before serving
For more recipes like this, check out our app: EatOutHealthy 🍓
Lemon Herb Roasted Chicken with Garden Vegetables.
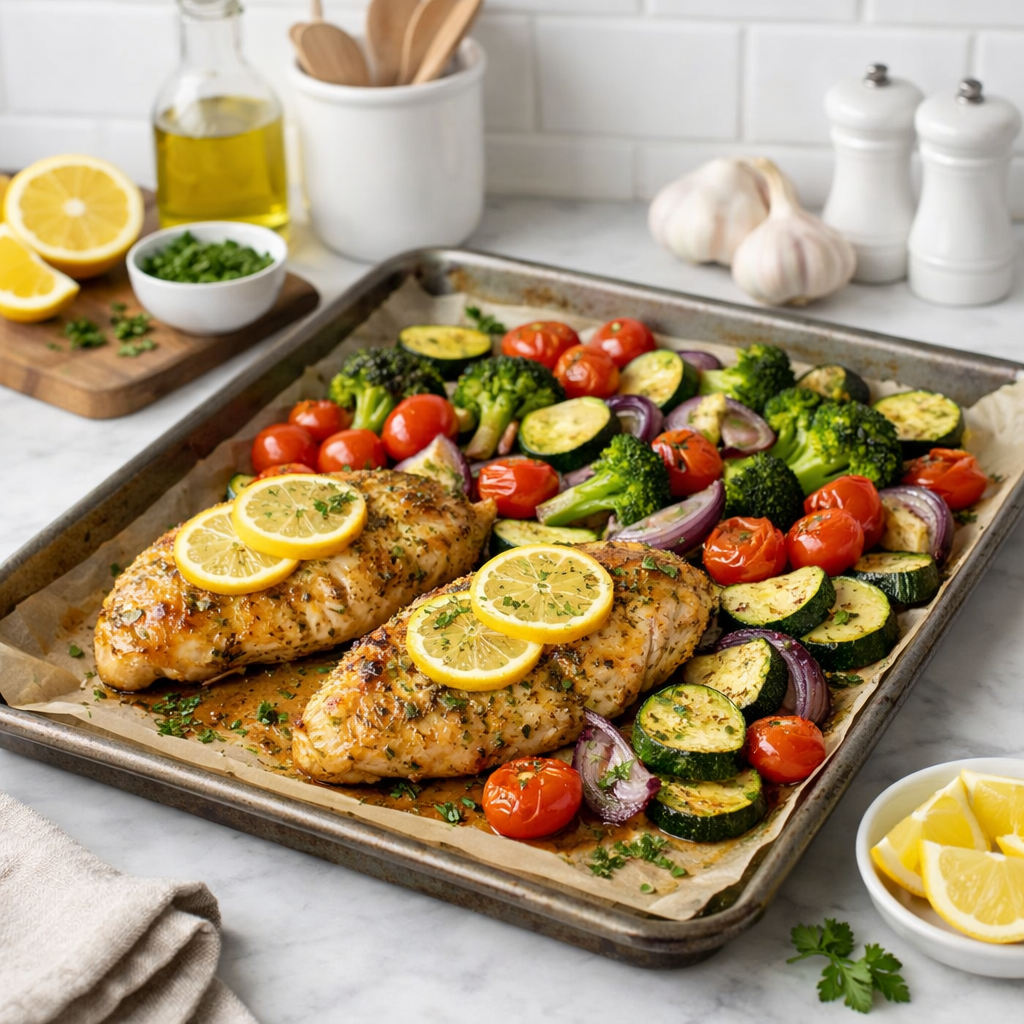
Comforting meals don’t have to rely on gluten or heavy ingredients to feel deeply satisfying. In a world where convenience foods often dominate the dinner table, simple whole-food recipes remind us that nourishing meals can still be vibrant, flavorful, and easy to prepare.
This lemon herb roasted chicken with garlic vegetables celebrates balance and simplicity. Naturally gluten-free and made with fresh herbs, bright citrus, and wholesome ingredients, it delivers savory comfort while remaining light and nourishing. It’s the kind of dish that works just as beautifully for a quiet weeknight dinner as it does for serving guests—proof that healthy cooking can still feel elegant and deeply satisfying.
Ingredients (Serves 2–3)
Chicken
• 2 boneless skinless chicken breasts (or 4 small chicken thighs)
• 2 tablespoons olive oil
• Juice of 1 lemon
• 1 teaspoon lemon zest
• 2 cloves garlic, minced
• 1 teaspoon dried oregano
• 1 teaspoon dried thyme
• ½ teaspoon smoked paprika
• ½ teaspoon sea salt
• ¼ teaspoon black pepper
Roasted Vegetables
• 1 cup zucchini, sliced
• 1 cup cherry tomatoes
• 1 cup broccoli florets
• ½ red onion, sliced
• 1 tablespoon olive oil
• ½ teaspoon sea salt
• ¼ teaspoon black pepper
Instructions
Marinate the chicken
In a bowl, whisk together olive oil, lemon juice, lemon zest, garlic, oregano, thyme, smoked paprika, sea salt, and black pepper.
Add the chicken and coat evenly. Let marinate for 15–30 minutes.Prepare the vegetables
Preheat oven to 400°F (200°C).
Toss zucchini, cherry tomatoes, broccoli, and red onion with olive oil, sea salt, and black pepper on a sheet pan.Roast everything together
Place the marinated chicken on the same sheet pan beside the vegetables.
Roast for 20–25 minutes, until the chicken reaches an internal temperature of 165°F (74°C) and vegetables are lightly caramelized.Finish with brightness
Remove from oven and squeeze a little extra fresh lemon juice over the chicken for added freshness.Serve & enjoy
Plate the chicken with roasted vegetables and garnish with fresh parsley or basil if desired.
Serving & Storage Tips
• Serve with quinoa, cauliflower rice, or a fresh green salad for a balanced gluten-free meal
• Leftovers keep well in the refrigerator for 3–4 days
• Slice the chicken and use it in salads, wraps with gluten-free tortillas, or grain bowls the next day
• Add a drizzle of tahini or avocado sauce for a creamy finish
For more recipes like this, check out our app:
9 Affirmations for Self Belief.
Written by Hali Tsotetsi
Image from Unsplash

One of the hardest things in life is believing in ourselves. This is something that I have been actively healing and working on, believing that I am truly worthy of success, happiness, and a life of wonderment.
Of course, it’s easier said than done. But every morning, I begin my day with some affirmations to help affirm me of the good that I am capable of and that is around me.
Here are 9 affirmations for self-belief:
1. I am worthy of happiness.
2. I am at peace with myself and any mistakes that I have made.
3. I believe in myself.
4. I forgive myself for any times that I didn’t get it ‘right’, with understanding that we are allowed to make mistakes.
5. I may not be perfect, but I am still worthy.
6. I believe that my best days are ahead of me.
7. I am capable of overcoming challenging situations.
8. I am worthy of healthy relationships with myself and others.
9. I embrace a life of abundance and success.
Healthy No-Bake Gluten-Free Chocolate Tahini Date Bars.
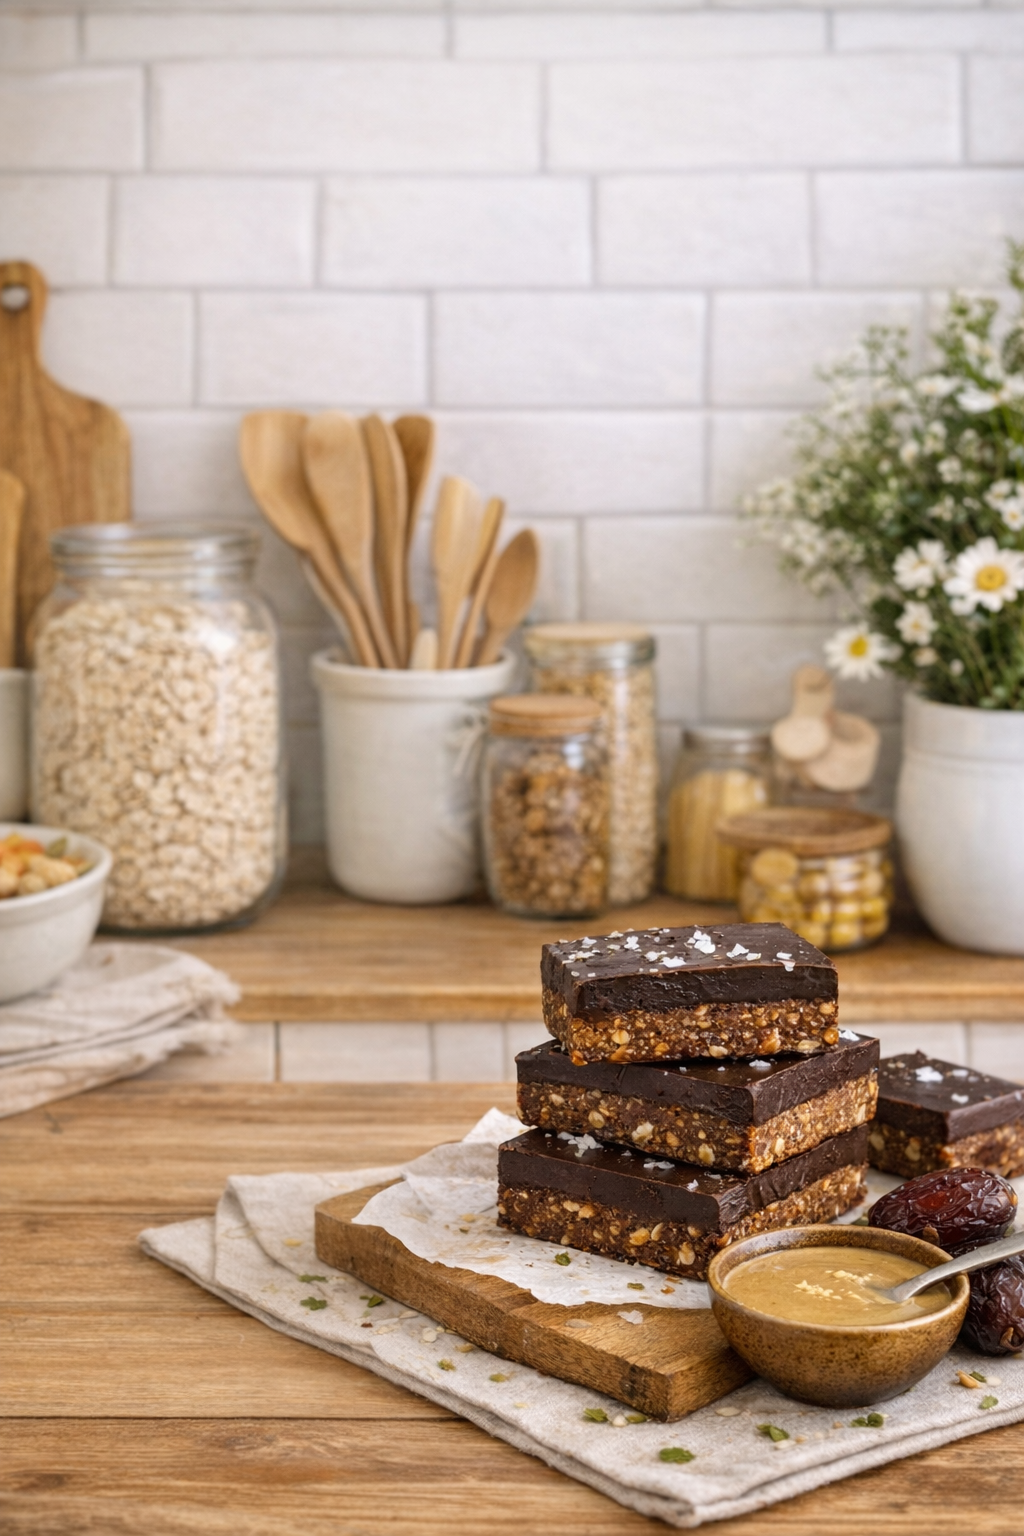
Sweet treats don’t have to come with compromise. In a world where wellness and indulgence are often framed as opposites, gluten-free desserts are quietly rewriting the rules—proving that nourishment can still feel luxurious, comforting, and deeply satisfying.
These no-bake chocolate tahini date bars are a celebration of simplicity and balance. Naturally gluten-free and made with whole, nourishing ingredients, they offer rich chocolate flavor, gentle sweetness, and a grounding dose of healthy fats—without refined sugars or complicated steps. It’s the kind of dessert that fits seamlessly into a mindful lifestyle, whether enjoyed as an afternoon pick-me-up or a guilt-free after-dinner treat.
Ingredients (Makes 8–10 bars)
Base
1 cup Medjool dates, pitted
1 cup gluten-free rolled oats
½ cup raw almonds (or almond flour for softer texture)
2 tablespoons cacao powder
1 tablespoon coconut oil, melted
1 teaspoon vanilla extract
Pinch of sea salt
Tahini Chocolate Layer:
⅓ cup tahini
2 tablespoons maple syrup
2 tablespoons cacao powder
1 tablespoon coconut oil, melted
Pinch of sea salt
Instructions:
Prepare the base
Add dates, oats, almonds, cacao powder, coconut oil, vanilla, and sea salt to a food processor.
Pulse until the mixture becomes sticky and holds together when pressed.Press into pan
Line a small loaf pan or square dish with parchment paper.
Press the mixture firmly into an even layer.Make the topping
In a small bowl, whisk together tahini, maple syrup, cacao powder, melted coconut oil, and sea salt until smooth and glossy.Layer & chill
Pour the tahini chocolate mixture over the base and smooth evenly.
Refrigerate for at least 1 hour (or 30 minutes in the freezer).Slice & enjoy
Once set, lift out using parchment paper and slice into bars.
Serving & Storage Tips:
Store in the fridge for up to 5 days
Sprinkle with flaky sea salt or crushed pistachios for an elevated finish
Perfect as a post-meal treat or mid-afternoon energy boost
A light and delicious Salmon plate, that is gluten free.
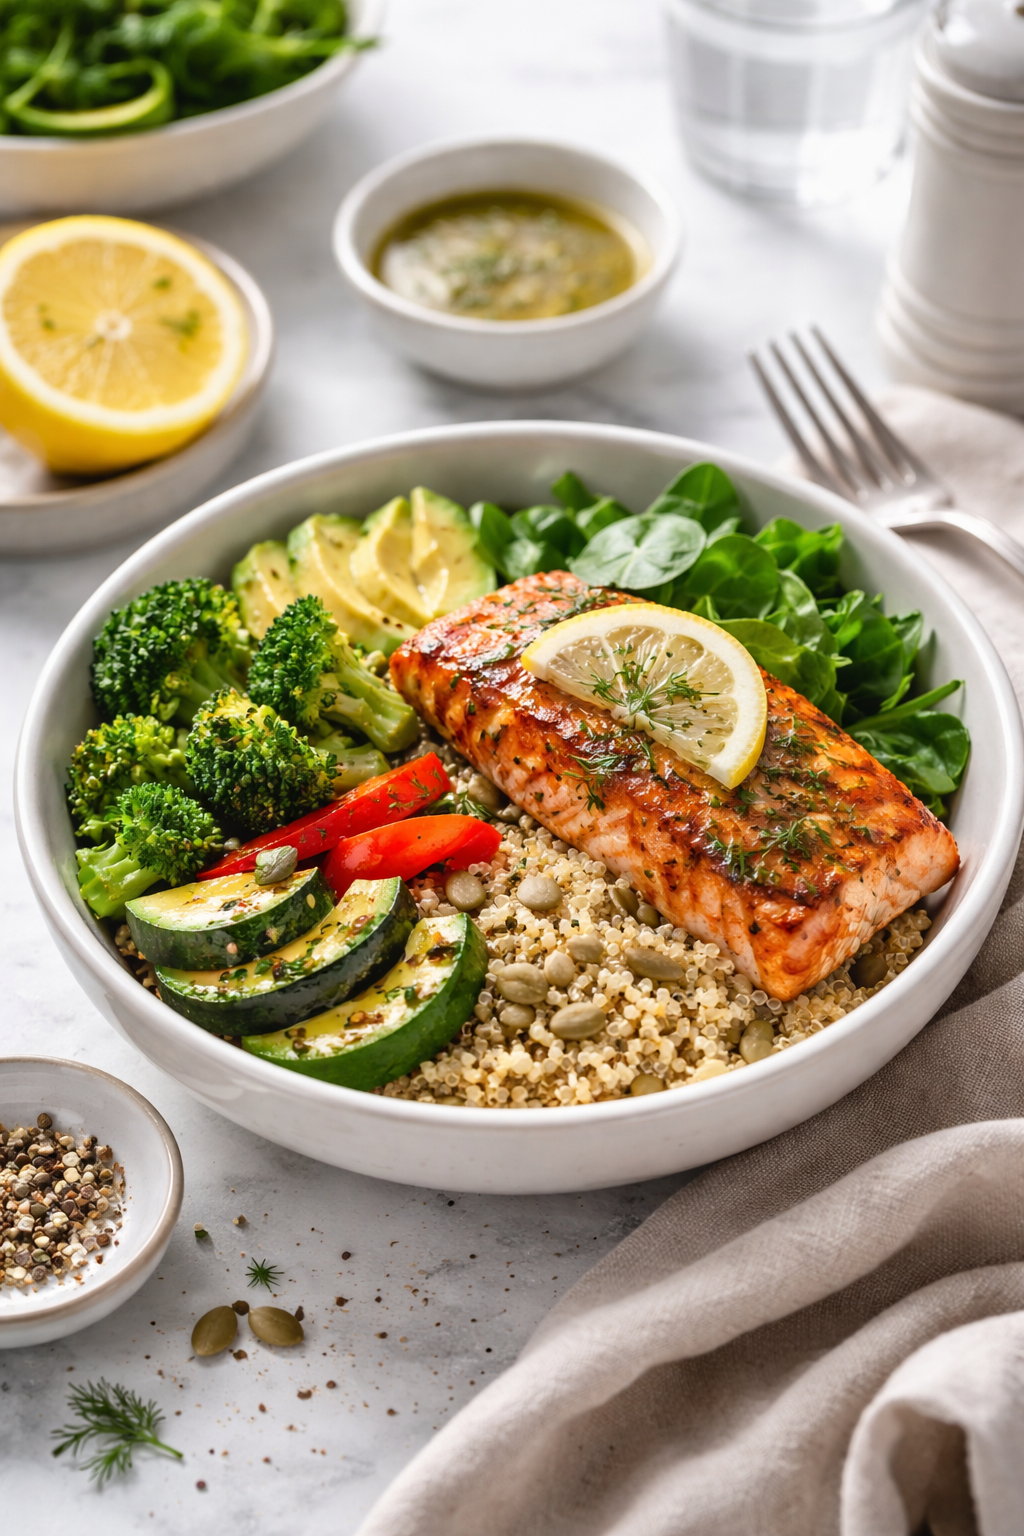
Eating gluten-free because of celiac disease has taught me something important: food should support your body, not work against it. When ingredients are simple, whole, and intentionally chosen, meals become easier to digest, more satisfying, and genuinely energizing.
This Lemon Herb Salmon Power Bowl is one of my favorite examples of that philosophy. It’s bright, nourishing, and naturally gluten-free — made without processed substitutes, hidden additives, or sauces that require decoding ingredient labels. Just real food that tastes good and feels good.
I reach for this recipe when I want a balanced meal that delivers protein, fiber, and healthy fats without heaviness. It’s easy enough for a weeknight, elegant enough to feel special, and flexible enough to adapt to what you have on hand.
If you’re managing celiac disease, eating gluten-free for wellness, or simply trying to build more intentional meals, this bowl is a reliable, grounding option.
Serves: 1–2
Time: ~30 minutes
Ingredients:
For the Salmon
2 salmon fillets (6–8 oz each)
1 tbsp extra-virgin olive oil
Juice and zest of ½ lemon
1 small garlic clove, minced
1 tsp fresh dill or parsley, finely chopped
Sea salt and black pepper, to taste
For the Grain Base:
1 cup cooked quinoa (rinsed before cooking)
Pinch of turmeric and black pepper (optional)
For the Vegetables:
1 cup broccoli florets
½ small zucchini, sliced
½ red bell pepper, sliced
1 tsp olive oil
Salt and pepper
For the Bowl:
1 cup baby spinach or arugula
¼ avocado, sliced
1 tbsp sunflower or pumpkin seeds
Lemon-Herb Drizzle:
2 tbsp extra-virgin olive oil
1 tbsp fresh lemon juice
1 tsp Dijon mustard (gluten-free)
Fresh cracked pepper
Instructions:
Prepare the Salmon
In a small bowl, mix olive oil, lemon juice and zest, garlic, herbs, salt, and pepper. Rub evenly over the salmon and set aside for 5 minutes.Cook the Quinoa
Cook quinoa using a 1:2 ratio of quinoa to water. Once fluffy, stir in turmeric and black pepper if using.Cook the Vegetables
Heat olive oil in a skillet over medium heat. Add broccoli, zucchini, and bell pepper. Sauté 6–8 minutes until tender but still vibrant. Season lightly.Cook the Salmon
Heat a non-stick pan over medium heat. Cook salmon skin-side down for 3–4 minutes, flip, and cook another 3–4 minutes until just opaque.
(Alternatively, bake at 400°F for 12–15 minutes.)Make the Dressing
Whisk olive oil, lemon juice, Dijon mustard, and cracked pepper until emulsified.Assemble the Bowl
Start with quinoa, add greens, layer vegetables and salmon, then top with avocado, seeds, and lemon-herb drizzle.
Tips & Variations
Low-FODMAP: Skip garlic and use lemon zest + herbs only
Extra protein: Add soft-boiled eggs or chickpeas
Mediterranean twist: Add olives and cherry tomatoes
Spicy: Finish with red pepper flakes or chili oil
For more recipes like this, click this link:
https://apps.apple.com/us/app/wholerootsrecipes/id6749336989
3 Ways that I have released internalized perfectionism.
Written by Hali Tsotetsi
Photo from Unsplash

In 3 years, God willing, I will be celebrating my 40th birthday on February 6th, 2029. And, as excited as I am to become older and wiser, I have let go of many things I have been taught or developed from insecurities. One of them is the need to be perfect.
I had a very demanding upbringing that required close to perfectionism, which was a lot for a child. How that manifested into adulthood was feeling like if I wasn’t perfect, I wasn’t lovable.
Only in my thirties have I unpacked this notion and, more specifically the past few years. I have finally understood and am practicing letting go of perfectionism.
Here are 3 ways that I am doing so:
1. Allowing people to paint me as the villain.
In most work situations, I was known as the sweet one. The one who was hardworking and got along with most of my colleagues. Until a recent work situation, which I can’t fully get into.
One thing I can tell you is that I spent years being tested my colleagues who were clicky, mean and toxic. I am not a victim and I had my reasons for staying but it cemented the idea in my head that some people just won’t like you. There are people in life that will hear rumors about you and believe them because of reasons that have nothing to do with you.
It is okay to be a villain in someone else’s story as long as you know who you are, what you stand for and represent.
2. I don’t have to be a size 0 and be happy.
I recently went through some serious health issues, only to be diagnosed with Celiac’s disease a year after being hospitalized. Celiac’s disease is an autoimmune disease that is a trigger response to the protein found in gluten.
When I went into hospital, I lost a lot of weight and people started commenting on how much I had lost. In two weeks, I lost 15 pounds. It was very noticeable. But, I was struggling deeply with my health. Despite people complimenting me about my weight, I was terrified that I would go back into pain and need expensive medical attention all over again.
So, I spent a year focusing on my internal health. I told myself that I don’t care what the scale says, I am committed to health. I am done internalizing other people’s weight issues and insecurities; my body deserves better than that. This body that has housed my soul and been there for me more than anything else, deserves to be healthy. I don’t need to starve myself to appease others in order to love myself.
This body is worthy of love, no matter size I am.
3. Releasing the idea that a mistake means something bad.
As I mentioned before, my upbringing was very demanding. I went to two British schools where most of my teachers embodied and resembled the infamous Mrs. Trunchbull from the book or movie, Matilda.
Culturally, the combination of African and British influences on my upbringing meant that if you said the wrong thing, you would be corrected in a way that demeaned you and made you feel less than. Effort was only rewarded if it was followed with perfectionism and an A on your report card. This put a lot of pressure on me and I used to carry that weight for years.
Until I released the idea of saying and doing things the right way according to status quo and making other people happy. I am human and I will make mistakes. It doesn’t make me less worthy of being alive or living. It just means that I may need to find my way, learn a different way, grow, mature and/or do things differently.
I deserve the right to make mistakes. We all do.
9 Affirmations for the Holiday Season.
Written by Hali Tsotetsi
Photo from Unsplash

While the holidays can be a joyous and celebratory time; they can also bring about negative emotions about loved ones. Please know that if you are having a difficult time this holiday season, you are not alone.
In addition, rambunctious and boisterous energy can be processed through the body as anxiety or even, depression. While I am not a doctor and advise those who are suffering through serious emotions this holiday season to seek professional help. We can use daily affirmations to help us process challenging feelings that may arise during this time of year.
Here are 9 Affirmations for the Holiday Season:
1. Even though there is chaos around me, I am at peace.
2. I look inward for tranquility.
3. I am aware of my emotional triggers and use healthy modes of healing to monitor them.
4. I speak to someone helpful for emotional guidance.
5. I give myself permission to be there for myself before my family or my friends.
6. I am worthy of people who show up for me and care for me.
7. I am worthy of healthy and genuine love.
8. I enjoy my own time.
9. I surround myself wit people that I genuinely want to be around.
3 Things I wish I was told before I turned 30.
Written by Hali Tsotetsi
Image from Unsplash

Before I turned 30, I was terrified of getting older. I remember spending my 30th birthday on the verge of feeling depressed as though I had spent my 20s wasting it on something other people, petty drama and, places that I didn’t want to live or be in. I felt regretful.
After spending a few days with the feeling of regret, I decided to change around my perspective and focus on my health, positivity and, being present. As I approach the (almost) end of the 30s, I am glad that I changed my perspective because it has been a wonderful 6 years that have been filled with some of the most invaluable lessons I could have ever learned.
Here are 3 Things I wish I was told about my 30s:
1. Don’t let anyone rush you into anything.
I spent my 20s rushing. I rushed through my diploma education, I rushed through moving to a new city and being in some monumental relationships. All that haste forced me to slow down because rushing made me feel as though I had wasted my time on certain people and things.
Once I decided to be present, I began to take things in and see things through experience and not a checklist. Life is meant to be lived moment-to-moment; not by checking off boxes. Achievements are worthy of achieving if you acknowledge the journey and the process of acquiring them.
2. Not everyone gets to live to their 30s and more.
The older we get, we start to see that not everyone gets to live past a certain age. Losing my sister cemented this ideology for me. I had taken time and people for granted until she passed away. Her passing showed me to live everyday fully but responsibly.
I developed the idea of gratitude and appreciation for being alive. Today is someone’s last day alive, don’t waste it on minor issues or people who are not worthy.
3. What is delayed is not denied.
This quote is actually from a YouTuber that I follow. Her name is Fumi Desalu-Vold. I admire her willingness to start a family, business and career when she was ready (her late 30s) and, not when other people told her to.
Sometimes I get asked if I want kids and people get shocked when I say that I do. The truth is that the generations before us were not emotionally capable of raising healthy children. They clothed us, housed us but a lot of us have had to heal from trauma. Which doesn’t make us victims; however, we can pass on this trauma or heal it.
I postponed starting a family so that I could heal what was passed onto me and choose my future partner carefully. I delayed being a Mother (whether it is biologically or through adoption) until I feel emotionally and financially stable. And when it happens, I will be grateful that I waited because I will be patient, understanding, supportive with my future partner and children.
Why do I want to forgive her?
Image from Unsplash
Article by Hali Tsotetsi

Why do I want to forgive her?
Because I believed that she was a trustworthy friend.
I forgive her because we all make mistakes and sometimes we are on the receiving end of someone else’s.
I forgive her because I am done remembering how she was not for me as a friend.
I forgive her because I was younger once, too. I was also gullible to what others said about people I was friends with.
I forgive her because carrying hurt will only harm me. Rewinding the past will only hurt me.
I forgive her because although I have put up a strong boundary towards her, I am freeing myself up from any anger that I ever felt towards her.
No person is worthy of holding a grudge against. Self-protection doesn’t mean that I have to relive the past in my head.